background

Monday, October 17, 2011

Two Halloween Banners

Banners and Bunting are EVERYWHERE and I'm jumping on the band wagon!!! I'm in LOVE with all the color they add to the room and all the personality that shines through them. The colors, mediums, themes, and possibilities are endless. Since I still haven't managed to turn my junk room into a craft room YET, I have no access to my sewing machine...and, honestly, I don't have time to sew anyway. So, for Halloween, I am making my banner out of scrapbook paper.
I used my 40% off coupon to by a coordinated paper pad at Michaels. Out of the 4 "Halloween" themed packs to choose from, I was torn between the two more whimsical ones. Now that the bannering is up, I'm delighted with the one I ended up picking:)))
 I just cut 6 inch wide by 8 inch long triangles and hung them on a ribbon with tiny clothes pins.
 The sheets have an image on the front and back and I love that it can be seen from the outside as well!
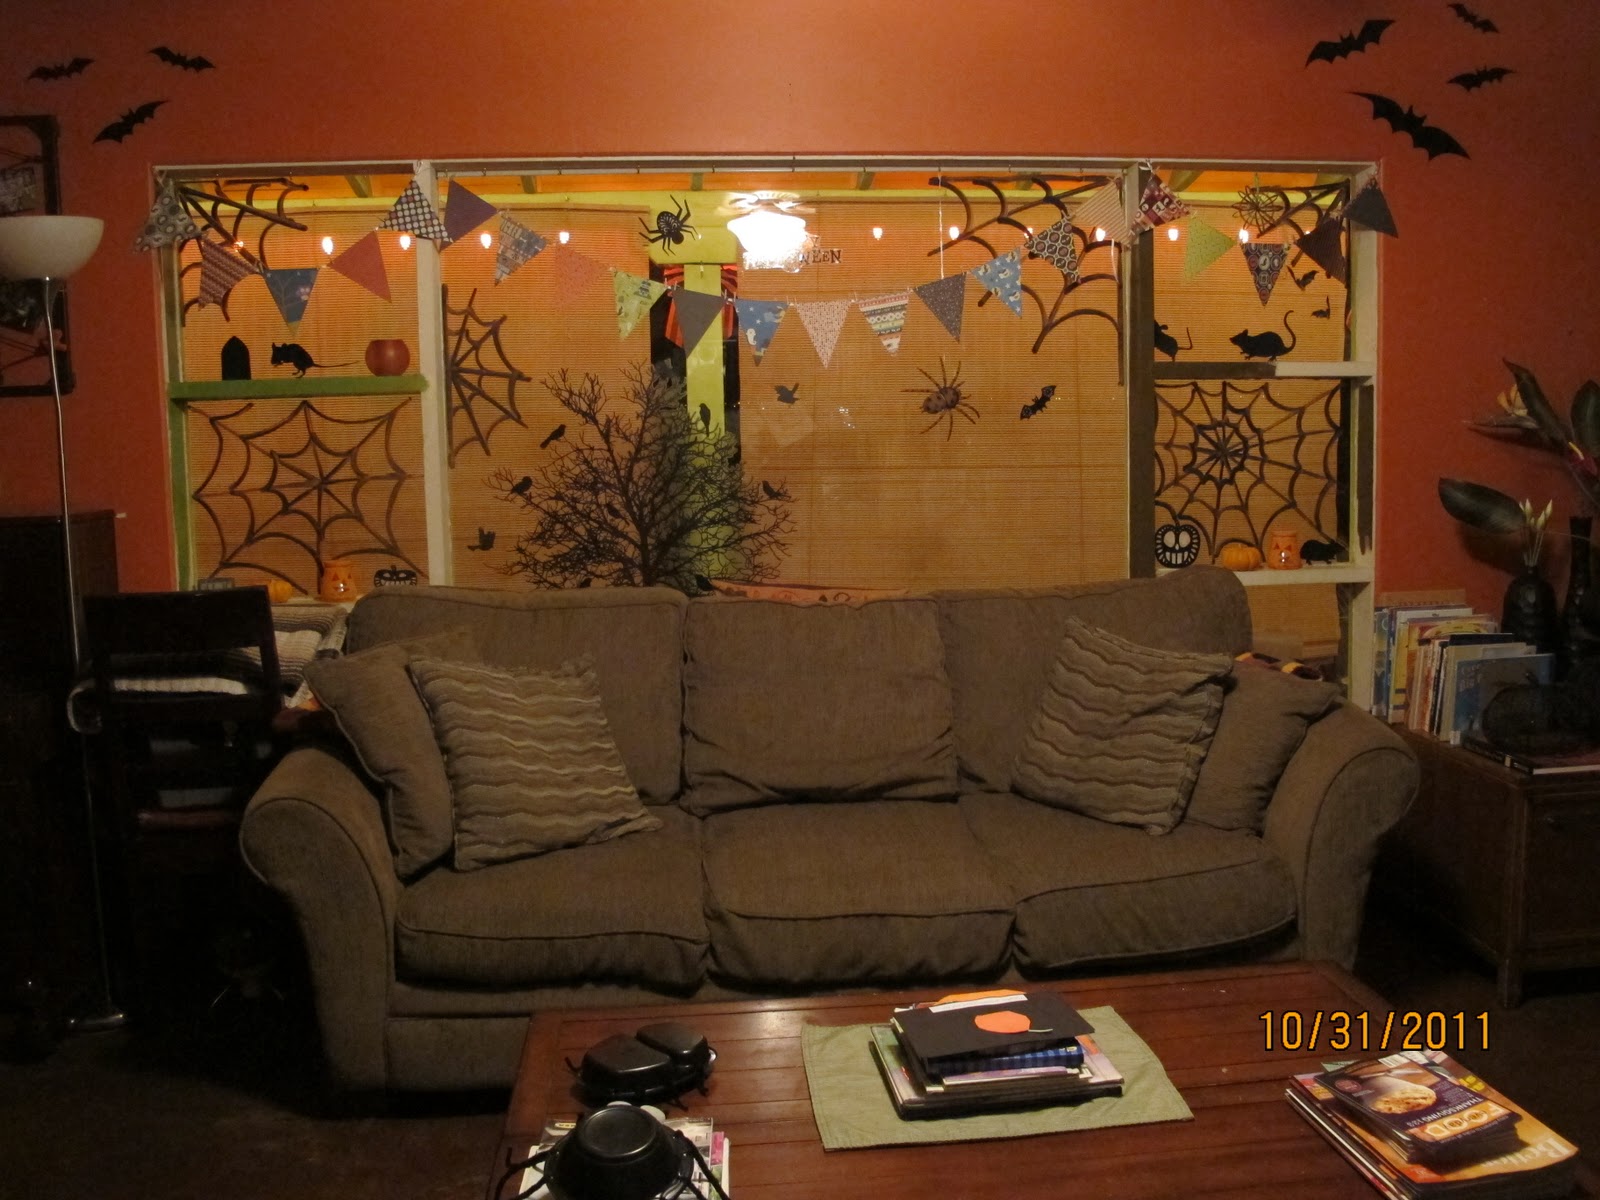
 I used window paint to draw cobwebs all over. More on that here.
I'm pleased with how it turned out:)
I also found a pack of Halloween themed "die-cut mat pads" which are meant to have a 4x6 photos mounted on them in scrapbooks and such, but I used them for a banner also. My intent is to write "trick or treat" on them, one letter per rectangle, but I haven't found vinyl or chip board letters big enough for them yet. Not gonna worry about it this year, but hope to do so for the next. This set also has an image on each side and I love that the paper bunting is flat and will store easily for years to come. I can just leave the ribbon up and repin the next seasons papers in their place.
*UPDATE*
I tacked photos of Halloweens past, including a pic of my prego with Levi belly painted like a pumpkin, to the mats instead of doing text. I love the way it turned out:))) I still have more mats so I can keep adding pics year after year on a new row of ribbon.

Sunday, October 16, 2011

Bath Murals from Craft Foam Sheets

I repinned this: http://pinterest.com/pin/216685872/ onto my "getting crafty with the littles" board and I ended up falling in love with this woman's entire blog!
Last week our sweet little neighbor friend had an ice cream party and I know she enjoys her bath time, so I decided to get her started on her own "bath mural" set. Plus, her mama is a crafty one, so I thought it would be a fun present they could work on together.
I came up with the stacking ice cream scoops from her invitation.
I think this might be a fun way to teach counting. Cut a few more scoops, put numbers on one side (leave the other side blank), and put in order. Maybe even adding and subtracting skills?
Then I totally stole this directly from the blog. The flowers came in a pack that I purchased at Michaels and I cut the rest out of a multi colored foam sheet stack...also purchased at Michaels.
I figured Halloween is right around the corner so I made a pumpkin and facial features.
And finally, I made a few words and letters using a Sharpie. Just wanted to give them a sample of the seemingly endless possibilities.

I plan on getting the boys set going as soon as the foam goes back on sale:)

Witch and Cats Yard Art

OK, I have been dying to make these: http://www.marthastewart.com/274616/halloween-witch-decorations/@center/276965/halloween ever since I got my October issue of Martha Stewart back in 2005!!! At the time I was pregnant with Levi and have used my kiddos as an excuse to not do things ever since. I am so stinkin excited to finally be doing it!!!
Joshua had a spare piece of 3/4 in plywood, of course;) He also borrowed his classroom projector because I didn't want to use up all our printer ink on the million pages of templates, nor take the time to cut them out and piece them together. I just cut out page 2 of the witch and cat templates, laid them on the projector and traced around the images. I had to shrink her down just a tad because the plywood had a chunk taken out of it already and there was a big knot in the wood were her hand would go if I didn't. And while the black paint would cover the knot, I wasn't sure if it would cut nicely or shatter. Didn't want to take any chances and didn't want to pay for a new piece of wood, so no biggie.
Then I was able to get two of the three cats on the upper half. Tomorrow I will cut her out with a jig saw.


We Are Like Pumpkins Printable.

This comes from one of my favorite crafty blogs. It's a free printable and can be found by going here: http://pinterest.com/pin/320521447/. I printed it out, popped it in a frame, and voila...It doesn't get much easier than that!!!

I put in on the ledge of our mirror in the dining room.

Tuesday, October 11, 2011

My Thrift Store Score...Framed Embroidered Owl

Went to Goodwill to look for Halloween costumes and came home with this little cutie:
 Finally got her hung up and photographed. A most beautifully embroidered owl. Complete with frame.
 Seriously...such sweet details. Such a fantastic score:)
It was tagged for $1.99, but my mom was with me and I got to use her 25% off senior citizen discount!!! (not that you could ever peg maaaa...  for a senior citizen because she looks like she has discovered the fountain of youth;)
 While I'm at it, I thought I'd give this one a mention too. Bought it a week or two before. It was in an ill fitting frame and had a card done in the same stitching. I'm assuming it was a gift to the previous owner.
Such a cool craft! It is now hanging above the piano on our "crib spring, turned memory board seen here.

Monday, October 10, 2011

Jar-O'-Lanterns

Saw these in my Family Fun magazine: http://pinterest.com/pin/244948026/. I picked out two jars from a box of random shaped jars Joshua had found on an alley romp. Then I cut out triangles for each pumpkins eyes, nose and mouth. I used scotch tape because I couldn't locate our masking tape. Hoping it peels ok!
 Then the littles got to work painting the jars and lids orange.
 I LOVE Levi's concentration!!!
Almost done...can't wait for them to dry and see how they turn out:)))
The next evening I took off the tape and let the boys put a battery operated candle in each.
They turned out super cut!

Alphabet Stamping

I bought alphabet sponge stamps over 10 years ago for a school project and have hung on to them, not because I'm a pack rat (wink, wink), but for this very day. The day my kiddos would be old enough to use them. I thought it would be fun for Levi to use a different medium to write his favorite words. It was the perfect way to use up the orange paint from the "jar-o'-lanterns" too.

Friday, October 7, 2011

Spider Webbed Windows

I used a "Speedball" glass marker to draw cobwebs on our windows. I used black, but now am wondering if I should have used white instead. If I go back to Michaels in the near future, I'll pick up one and try it out. Otherwise, maybe next year.
*pictures coming soon*

Monday, October 3, 2011

Pepproni Pizza Cresents

October 3, 2011.
I repinned these "pepperoni pizza bites": http://pinterest.com/pin/244969955/ onto my "fun with food...for the littles" board. And, indeed, it was FUN!
First, I tore the paper back and POPPED open the crescent rolls...which, to this day, still totally scares me! I remember "the wait" as a kiddo for that moment when my mom would "pop" open the cinnamon rolls. Then the boys spread on some pasta sauce.
Next they placed the cheese sticks at the large ends and added two slices of pepperoni to each. We left two meat free for papa and added an extra cheese slice to each of his. Then I rolled them up while the boys washed up.
 I cooked them according to the packages instructions...
...and they turned out delish!!!

Thursday, September 29, 2011

Non Browning Apple Snacks For School

September 29, 2011.
A friend of mine pinned this: http://pinterest.com/pin/253762617/ to her board a while ago, but I didn't "repin" it because I didn't think Levi liked apples too much. I either send grapes or cantelope along in his lunch. However, Joshua was kind enough to go to Costco for me last night and he purchased, among other thing,  a 12 pack of apples (not on the list;). So, I decided to try this trick this morning. Levi was watching me rubberband the apple together and asked why? I told him it's supposed to help keep the individual slices from browning. He thought it was pretty cool!
Levi said the trick worked and he ate the whole thing!!!
I love that it helps add a little more variety to his lunch. Will definitely be redoing.

Tuesday, September 27, 2011

Pipe Cleaners and a Colander...keeps littles busy

September 27, 2011.
Found this pin on Pinterest http://pinterest.com/pin/245424753/ and thought it looked entertaining. I LOVE working with pipe cleaners and we have a ton sooo...
 we started feeding the pipe cleaner through the colander.
 ...
 Abey thought it was pretty fun, but the activity didn't hold his attention as long as I'd hoped. I wanted it to be something he could fiddle around with on his own, while I did my stuff, but he wanted to sit with him and help. I had fun to though.
 A lot of our pipe cleaner were all tangled together from previous projects...Abe got a little frustrated;)
 But then it turned into a pretty funny hat!
 Abraham ran and got a towel rag to use as a cushion...the pipe cleaner were pretty pokey.
...mama's turn!

Words made with Pipe Cleaner and Yarn

September 27, 2011.
I repinned this lovely little idea: http://pinterest.com/pin/245437774/ to my "getting crafty with the littles" board. All you do is twist a word out of pipe cleaner and then wrap the pipe cleaner in different colored yarn. So, while Abraham was working with the "pipe cleaner and colander activity" from my previous post, I took one and made the word "love".
Now I just need the yarn...TO BE CONTINUED!

Sunday, September 25, 2011

Eggs in a Mug

At a doctors appointment I came across an article that showed how eggs can be cooked in a mug in the microwave. I failed to write down and now can't remember which magazine I was looking at:( So, I came home and researched recipes and pinned this one. http://pinterest.com/pin/237436252/
I used only one egg in a gynormous mug and it only to 30 seconds. It puffed up to half the size of the mug, then I added shredded cheese. So SIMPLE...and yummy! I can take the mug and run out the door:)

Tuesday, September 20, 2011

Repurposed Globes

September 20, 2011.
There are a ton of repurposed globes and maps all over Pinterest, but here are two I recently repinned: http://pinterest.com/pin/192979480/ (bowl) and http://pinterest.com/pin/109002407/ (lamp). Then Joshua came home with this alley romp find!
Only problem is that it is from a Leap Frog geography toy, so it's full wires and the gazmos that make it work. It also has two cracks in the surface, but no biggie.
It came off of it's stand super easy and now all I need are the guts to cut it open. Need to work on my follow though!!!

Saturday, September 17, 2011

Chalking the Alphabet Game


September 17, 2011.
I found this idea while going though my back issues of Family Fun Magazine and tried to find it on their site to pin it to Pinterest, but I couldn't find it even when I typed in the issue month and year...hmmm. FYI it's from March 2010 under "My Great Idea."
The idea is to chalk the alphabet, call out a letter, and have your child locate and stand on it.

pic coming soon:) it's on my phone.

I didn't want to overwhelm Levi with all the letters he doesn't know, so I just drew the ones he did, hoping to reinforce them, and added a couple of site words and shapes. It ended up being a fun game...one we will continue and gradually add new letters as he learns them, use upper and lower case and increase the site words vocabulary.

Friday, September 16, 2011

OOBLECK!

September 16, 2011.
I repinned this: http://pinterest.com/pin/145881410/ which takes you to a blog where the blogger has compiled a TON of "art and sensory recipes". One of them, I was happy to find, was for OOBLECK. I first came across the recipe while getting ready for Abraham's Dr. Seuss party and thought it might be fun to make, you know, let the party goers get a little messy. But, then the thought of fourteen 3 to 5 year olds running around with food colored muck on their hands kind of scared me, so I scrapped that idea! (and the party was still a blast without it:) When the party was over and the books came due we returned Dr. Seuss' "Bartholomew and the Oobleck" and another neato book called "Oobleck, slime, & dancing spaghetti: twenty terrific at-home science experiments inspired by favorite children's books" by Jennifer Williams. I swore to myself I'd check both books out again at a later date...three months came and went and I still hadn't done it. Thanks to Pinterest, and my attempt to stay accountable, I have finally done it. I busted out the cornstarch that has been sitting on a shelf in my pantry for years, let the boys mix in water and food coloring in a big glass bowl and VOILA!!! It's so easy and fun I'm kicking myself for not doing it sooner...as usual.
1 1/2 cups Corn Starch.
1 Cup Water
A few drops of food coloring. 
While the Oobleck that falls from the sky in the book is green, we decided to do blue. Abey got a little naughty later and added a ton more food coloring and we all walked around for a few days with blue hands. It was funny though because everywhere we went, people would ask why our hands were blue and the boys would tell them about Oobleck:)))
Stir...
At this point it felt like it was vibrating as it dripped from our hands!
Eventually it started to "thicken up" a little, but it took a while of working it to get the right consistency. Next time I'd use more Corn Starch or less water. Another site I found said add water slowly and stop when it's about the consistency of pancake batter.
 We used a funnel and all kinds of playdough tools.
 Levi experimented with drying it out, which really helped get it the right consistency!
 The bestest part of Oobleck is that with pressure it becomes a solid. I squeezed it into a ball in my hand, then as soon as you let go...
It turns back into a liquid!!!
Levi stayed home sick from school today and this really helped liven his spirits. FUN FUN FUN!