Friday, January 13, 2012
Phoenix Fire Pit
I am sooooooo excited that my hard working hubby is starting a blog of his own to showcase his super duper uber cool fire pits and rail road art made from recycled materials!!! It's called Phoenix Fire Pit and can be checked out by going HERE!
My Accomplishments So Far
Despite the fact that I haven't been posting pics of finished projects, I have been saving their "title" as a draft as I do them. Someday, when I get a more efficient way of looking for photos on my computer, I hope to go back and post them, as was my original intent with the blog!!! So...to date I have completed 70 pinned ideas out of the 1000!!! currently pinned to my Pinterest boards.
One of my New Year's resolutions was to not make anything that took my time away from the boys while they are home. Though crafty things that involve the littles and food stuffs that go in our bellys are still permissible. It's going to be hard, but I think worth it...especially to Abe now that Levi is in school and he's lost his playmate. I still do 20/10 with him, so I can get the usual home stuff done...cleanin', bill payin', cookin', but ME projects are on hold until Abey goes to school...or someone watches him. (wink wink...maaaa)
However, I am now in party planning mode for Levi's 6th birthday and will at some point need to make a few things for the party, but they aren't time consuming and Abe might even be able to help me. I am "allowing" myself some time to make his invitation during my 20 of 20/10 and not gonna consider it a violation of my resolution because technically I'm doing it FOR Levi;)
With regards to my blog, I am so glad I can look back and see what I have accomplished, albeit not the way I had envisioned. I was surprised and ELATED when I totalled all 70 of the posted and drafted posts. I am sooooo THANKFUL for Pinterest and the spark it ignited in my heart to actually MAKE stuff:)))
Sunday, November 13, 2011
Candle Filled Mason Jars Suspended By Wire
Joshua and I, being the hoarders we are, have boxes and boxes of Classico spaghetti sauce "mason" type jars. We even gave boxes of them away! Not sure if that means I'm a good pasta eating 1/2 Italian or that I need to branch out in the food department;) I've seen countless pins of all the cool stuff you can do with mason jars, but never repinned them, so I don't have a link to go to. But on 10-22-11 we went to the most darling "cowgirl" party for our dear friend's daughter and the setting just blew me away. The lucky little birthday girl has one seriously crafty mama!!! 

This was their backyard the night of the party.
Notice what are hanging in the tree in the background? Candle filled mason jars suspended by wire. It looked magical!
*note...we stole used Jen's idea of the hay bales surrounding the firepit for our Halloween party the following weekend. Joshua scored the hay bales off of free cylce!*

***1/20/12 UPDATE***
I 've made 8 so far, but I've given up until I get a thinner gauge wire. This stuff hurts my fingers and takes too long. A thinner gauge will definitely speed up the process:)))
Monday, November 7, 2011
Bohemian Twist Hair
I'm not even sure how I arrived at this site, but I'm sure glad I did: http://www.youtube.com/watch?v=mOlmRc5Uk68. Super easy tutorial. I ended up watching several of her other videos too. Then I tried it out myself.


Not too bad for a first attempt;)

I'm not so excited about this side though because, as I've mentioned in the other hair posts, my hair is markedly thinner on my right side. However, I don't think there is much I can do about that. I have to work with what God gave me;)

Realized I should've used a hair tie that would blend. Oops!

This is definitely something quick and fun to do with my "hair cape."
A Quest for Contemporary Christian Art
I just ordered this PRINT. I pinned this one ages ago and just couldn't get it out of my head. I'd click on it now and again just to read it and it makes me smile. I pinned it thinking I would try to recreate it in photoshop one day. But tonight, just out of curiosity, I clicked on the link to be taken to the Etsy shop that sells the print and was shocked to see that it was only 30 bucks!!! Without even hesitating...I JUST BOUGHT IT. So. Not. Like. Me. I can be impulsive when I shop at, say, Target, but then I can just return the items once I realize I really didn't need the same shirt in 3 different colors, or even at all. This, however,=not so returnable. Years ago I went on an Internet quest in search of contemporary christian art with the hopes that we could fill our home with biblical images (for the boys room), words, and reminders of what's really important in life, but never found anything that spoke to me and was visually pleasing at the same time. Apparently, I wasn't using the right search words or "christian art" has come a long way. I'm pleased to report that Pinterest has gobs of cool prints...more on par with what I had in mind when I began my search. I would also LOVE LOVE LOVE this PRINT for our bedroom!!!, but $50 is a bit steep for us at the moment. Hopefully someday;) Can't wait to post a pic of the print when it gets here...
***UPDATE***
Sooooooo excited!!! My maaa, who is notorious for giving the PERFECT gift year after year, gave me the "WHATEVER" print for Christmas:))) I couldn't be happier! I love it so much that now I want 2 more...one for the living room and the boys room too...HA! (sounds like the problem I have with clothes from Target, huh?) But the point is...I love, love, love it!!!
Saturday, October 29, 2011
Pumpkin Trifle
Because I'm obsessed with trifles and pumpkins and fall: http://pinterest.com/pin/87235822/


This was supposed to go out last night at our Halloween party, but I was running around like a chicken with my head cut off prior to the event and didn't get it assembled in time. Plus, there was plenty of food out already and more kept coming as guests brought their goodies to share:)

The good news was I got to bring it to the annual neighborhood pumpkin carving party. It's over on the table with Marnie's impromptu, though oh so delicious, chili.

I totally forgot to put the solid packed pumpkin in with the pudding, but the dessert still managed to disappear into thin air...muah ha ha ha;)
*my favorite part about trifles is that they look impressive, but are so incredibly simple!!!
Friday, October 28, 2011
Forked Eyeball Halloween Treats
I pinned these here: http://pinterest.com/pin/173208607/ for easy reference, but originally saw them in my Family Fun Magazine when it was delivered back in 2008. HA. My sister introduced us to Bakerella's cake balls years ago, but what I liked about the Family Fun Mag's idea was that not only was it decorated perfectly for Halloween, but it used time saving pre-made donut holes too . The boys and I made a donut hole version on lollipop sticks for Levi's 5th birthday party and they were a hit, so I decided to use that "TRICK" again. I called Dunken Donuts ahead to see if they would have 50 or so for me to pick up right away or if I'd have to place a special order. The employee told me what flavors were available immediately, but said others could be available in a few hours. I almost died when she said "JELLY FILLED MUNCHKINS" were an option!!! I thought BLOOD GUSHING EYEBALLS couldn't be any more perfect for Halloween!!!


 Meanwhile, I was frantically looking for the recipe online on how to get the icing more fluid...and, of course, I didn't look it up ahead of time. But in my defense, I don't remember having the same problem the first time we did these. Hmmm. The cure was adding some oil.
 Another problem we encountered was the jelly was tainting the icing, leaving pink trails. So, I sent the boys to play while I plugged all the holes with candy melts.

 The next day I bought more M & M's (fall colors for the Halloween party snack mix) and am kicking myself that I didn't by regular for the green and maybe some blue, but I'm cheap. Then I started adding the bloody veins. I thought using the pressurized canned frosting would do the trick, but the lines were coming out too thick. Ultimately, I wanted to just draw the lines with edible food coloring pens, but my red one was old and not working. So, I squirted the red icing into a baggie, clipped a tiny hole in the corner and found it to work much better than the can...way more control of the flow!!!


My lil helpers and supplies.

We melted the chocolate in the microwave and the boys each did a test donut. The icing was still way too thick, so they had to be eaten...much to the boys delight.


Then it was back to work. Love the concentration!
I really wanted this would be fun, but my perfectionist personality was causing me to stress out because... heaven forbid...the white frosting was dripping down the black forks. I found myself nagging them to please be more careful, which is no fun for them:(
However, they were total troopers.
And, as it turned out, they were bored after only doing half...which meant I could finish them more "perfectly." This was not the case though. They continued to drip for me too. I decided to embrace the drip and think of it more as eyeball ooze that would lend to the creepy effect of eating a bloody eyeball. Then I attached green M&M's with the leftover candy melts. I didn't have enough M&M's to finish so I just let them dry, then put them in gallon zip lock bags, making sure they were not touching each other. 


A lil close up.
When they were dry I slid them into individual clear plastic bags that I purchased at ABC Cake Decorating Company and used a twist tie to seal them up.

Then the wolf and I got to pass them out at our Halloween Party. YAY!!!
Wednesday, October 26, 2011
Altered School Photo for Halloween
Not sure where the inspiration came from on this one. I had seen in Halloween magazines past, maybe Martha Stewart Living, where they make photos look like the eyes are following you. Or at the Halloween "Spirit" stores where they are selling hologram like pictures where, as you walk past, the image in the pic goes from normal to skeletal, or zombie like. Anyway, I was hot gluing googlie eyes on another project and thought it would be funny to put them on the glass of Levi's school photo and see if anyone noticed. Then I thought I could draw on the glass like I do for the framed glass and scrapbook paper dry erase board I posted here.

In the end, I made Levi a pirate and he thinks it's the funniest thing!!!
***UPDATE***
A while after Halloween Levi asked if he could do his own drawings on this photo. I need to post pics. He had a lot of fun!
Pumpkin T.P. Rolls
Thought this whole craft station was cute: http://pinterest.com/pin/176894047/, but I only made the t.p. rolls for our bathroom. I embellished them slightly different, but loved the inspiration!
 The timing couldn't be more perfect. Costco stopped individually wrapping each roll of t.p. which made me sad, but this will take care of that problem for a while;) Abey always wants to be in the picture. LOL.


...and here they are all done.
I cut the faces out of paper, the leaves from tissue paper (though I'd use card stock next time), and stems from pipe cleaner curled around a pencil. So so simple and cute!!! Click here for the pumpkin leaf template.
In the guest bathroom.

...and in the master.

This is a wall cabinet to add some much needed storage that has just been sitting on the floor for months!!! Adding it to the list of things to do now:)
Tuesday, October 25, 2011
Halloween Bat Lanterns
Came across this super cute idea: http://pinterest.com/pin/320605497/ and pinned it to my "Halloween" board. l already had the lanterns...we bought them years ago at Cost Plus with a gift card from one of Joshua's piano students. And, surprise surprise, they've just sat on a shelf in the green room unopened. I like the large lantern in the pin way better, but these were free and needed to be liberated from their dark cupboard so they could shine light on our party goers. I used this bat template and cut out 3 bats in each size for each lantern, so nine bats per lantern. I creased them in four spots to give them some dimension and used a hot glue gun to attach them.


I popped in the batteries and hung them up...I LOVE THEM!

Seriously!?!...this is the only picture I got:( There was one for each tree lining our driveway.
Friday, October 21, 2011
No Heat "Twisted Bun/Bantu Knots" Curls
Repinned another version of no heat curls:http://pinterest.com/pin/350945928/.

 I sprayed my hair with water all over to dampen it. Then twisted and bobby pinned.


My first attempt...
I divided my hair in half and clipped the top up while I made four buns on the bottom. Then I unclipped the top and made six on the top...three on each side.
 I sprayed my hair with water all over to dampen it. Then twisted and bobby pinned.
Then I was off to bed.

The next morning...
Oh my goodness, this is what unraveling the first ONE looked like!
...and on a side note: I had no problem sleeping on the buns and they didn't unravel.
The curls were waaaaaay tighter than I thought they would be!

The right side of my head has less hair then the other, so doing three buns on this side made the curls even kinkier. Plus, they were much harder to unravel. My hair was getting all tangled and frizzy.
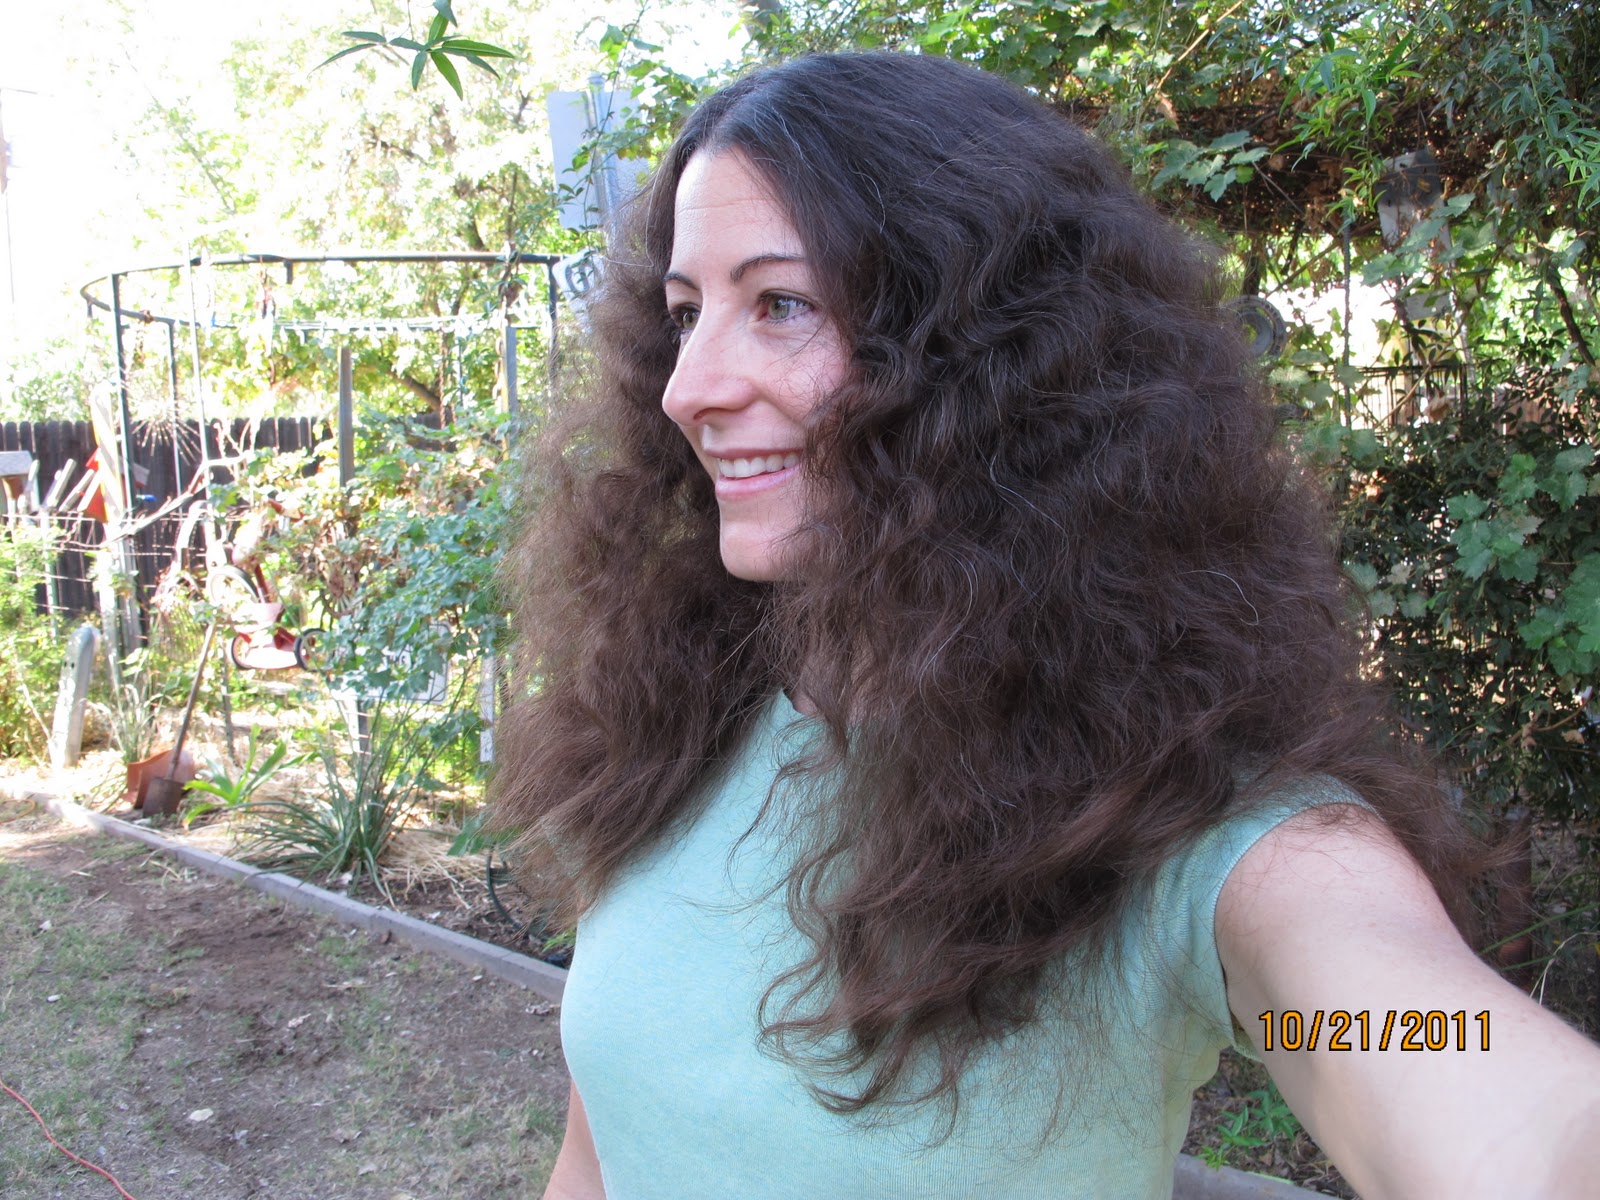
Then I made a HUGE mistake!!! (pun intended;) I brushed it out. LOL!!!

I tried to tame it down by running Frizz-Ease all through it, but my hair was sooooo huge I just wore it back in a little claw when we went to the park.
So, lessons learned...1.) My hair is so thin I need to make fewer, thicker buns and 2.) Make fewer buns on the right side to make up for lack of hair. Will definitely try this method again.
Wednesday, October 19, 2011
Foot Print Ghosts
Thought this was cute so I repinned it: http://pinterest.com/pin/145883907/. Halloween foot print art.


 Turns out ma and Levi have high arches so i filled in the gaps with left over paint. Once it dries I'll add the eyes. I need to get to Michaels to buy a white marker to finish it up. Can't wait.


The boys got to paint G'ma's foot with white acrylic paint. G'ma is ticklish and thought the paint was cold!!!

They covered her whole foot.

Then we placed her foot in the middle.

Next it was the boys turn. I thought I would paint one and G'ma the other, but the littles wanted to do it all themselves.

Lity's turn.

Then Abradoodle's.

Just love this pic of Abey and Grammy.


TA DA!!! It's so so so cute:)
Went to Michael's and scored the simple 12x12 scrapbook frame on sale for $4.99. Bought a couple extra too;) The white Sharpie paint marker didn't work as well as I had hoped. I went over the lettering a couple times, but it never turned opaque...no biggie, more ghostly sheer I guess;) I used left over ribbon from last years wreath and tied it around a nail and tucked the ends behind the frame. Then I used the super cute hair clip my neighbor made (and put in our boo bag:))) to hide the nail and embellish it all. Only problem is I can't wear the clip:( Then Levi came home with this adorable paper framed pumpkin craft and it added that much more cuteness to the wall.
***The painting of the door and wall need to be done a.s.a.p. No doubt with this whole holding myself accountable thing, it will get done.***
Boxes into Buildings
October 19, 2011.
A little update. Levi still likes using his original box from the original post below...dated 9/20/2011, but today he just blew me away with this architectural genius:) I've been saving more boxes for him and kept this larger one in the pantry. He used two t.p tubes and one paper towel tube, that he cut in half, to make the stilts. Then he cut open another paper towel tube to use as a ramp!


September 20, 2011.
I went to Costco today and came home with some boxes that I would normally put right in the recycle bin, but I had remembered pinning this: http://pinterest.com/pin/122322967/ a while back and thought I'd give it a try. Our version was done by taping 8.5 x 11 pieces of scrap paper from Joshua's school to the boxes and letting the boys draw "the details."


A little update. Levi still likes using his original box from the original post below...dated 9/20/2011, but today he just blew me away with this architectural genius:) I've been saving more boxes for him and kept this larger one in the pantry. He used two t.p tubes and one paper towel tube, that he cut in half, to make the stilts. Then he cut open another paper towel tube to use as a ramp!

Voila!

I helped him take it to the bedroom. I showed him that by cutting two slits in each tube he could keep the top box from shifting so much. Levi added the green Duplo to the stilt that was too short. Then he continued to draw on it, including a "camper" parking space. I caught a pic just as the camper was going off the edge. Oops!
I went to Costco today and came home with some boxes that I would normally put right in the recycle bin, but I had remembered pinning this: http://pinterest.com/pin/122322967/ a while back and thought I'd give it a try. Our version was done by taping 8.5 x 11 pieces of scrap paper from Joshua's school to the boxes and letting the boys draw "the details."

Posing time.

I never got a finished product picture of either of them, but Levi used his as a garage for his truck. His drawing is on the back. He didn't want to to put paper on the front. He liked the oranges. LOL...go figure!
***So, my vision was to have them fully wrapped with way more house like details, but I've got 29 more years of drawing experience;) I'm just glad they had fun doodling. Someday I hope to surprise them with a finished set like the ones in the "PIN." Gotta add that to "THE LIST"!!!
Tuesday, October 18, 2011
"The List"...of projects to finish!
finish witch/cat post10/21/2011
finish ghost foot prints and post pic 10/19/2011
pics of spider webbed windows 10/7/2011
boxes into buildings...9/20/11.
finish globe project from 9/20/11.
wrap pipe cleaner "LOVE" in yarn from 9/27/11.
add a photo to "chalked alphabet" from 9/17/11.
paint "memories" sign green from 8/28/11.
finish ghost foot prints and post pic 10/19/2011
pics of spider webbed windows 10/7/2011
boxes into buildings...9/20/11.
finish globe project from 9/20/11.
wrap pipe cleaner "LOVE" in yarn from 9/27/11.
add a photo to "chalked alphabet" from 9/17/11.
paint "memories" sign green from 8/28/11.
Framed Glass and Scrapbook Paper Dry Erase Board
Back in March I cut, framed, and hung a dry erase board on our front door. It can be seen by clicking here and scrolling to the bottom of the post. It had a major flaw that I never fixed. I just let it hang there like that all these months because, well, that's just what the "old me" did. However, the "new me" decided to do something about it TODAY! I had come across the idea of putting scrapbook paper in a glass fronted frame to make a customized dry erase board on Pinterest, on several occasions, but I had never repinned it. For this posts sake, I repinned a couple this morning to use as examples of what other people have done: http://pinterest.com/pin/346540618/, http://pinterest.com/pin/346483963/, and my favorite, http://pinterest.com/pin/346483963/.

At first I cut out a piece of scrapbook paper that matched the living room's color scheme and hung it up. It looked good, but then I decided I could change up the papers to match the season, just like the banners! So, I used a piece of scrapbook paper from my super duper uber cute Halloween stack.

I'm not too happy with the scale of the 8x10 image on the giant door, but it serves it's purpose and the boys can't reach it and accidentally erase anything.
No Heat "Sock Bun" Curls
I just repinned this today, http://pinterest.com/pin/350877801/ but actually watched the videos a while back. The link takes you to a site showing videos of 3 different ways to achieve "no heat" curls. I think the two sock methods would be more suitable for my hair type and length. Then last night, on a whim, after everyone was asleep, I decided to try the "How to Curl Your Hair With A Sock" one.

This was the sock I cut. It has sentimental value to me...I bought it while I was going to school in England on an exchange program. It's like 15 years old and all peely, but I'm giving it new life!
*Abe wanted his hand in the picture.*

This is what it looks like all rolled up.

I am quite pleased with how my hair turned out. I did mine as a low bun though because I find my scalp hurts when I put my hair up too high...weird I know.
*Abe jumped in on this pic too:)*
*Abe jumped in on this pic too:)*

The left side of my hair turned out better because I pulled the bun to my left as I was rolling it up. I couldn't reach the back or see what I was doing going straight back. I think next time I'll do one on each side, like Princess Leia and see what happens.
Subscribe to:
Posts (Atom)